Creating a Training Course
To create a training course, there are two possible paths:
- Either from a thematic base, choose the Training tab, then click on the NEW TRAINING COURSE button.
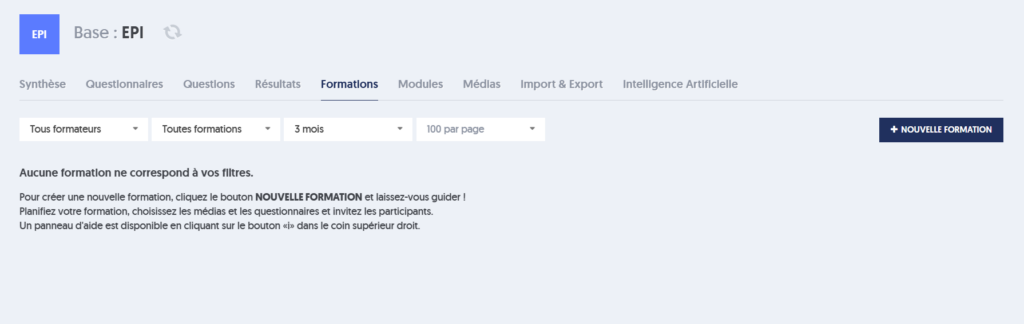
- Or from the Training page, which presents all training courses combined, select a thematic base from the drop-down list, then click on NEW TRAINING COURSE.
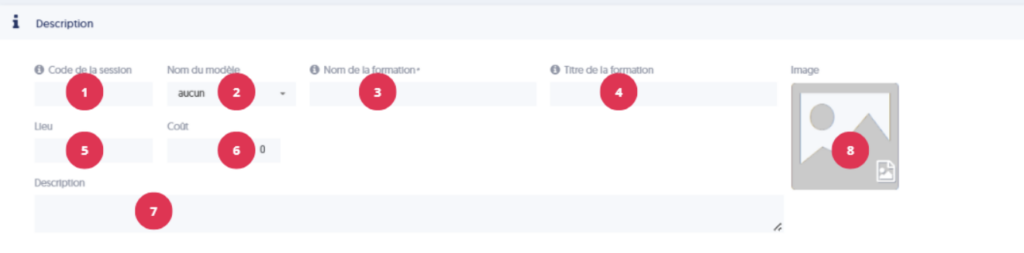
Fill in the characteristics of the training course:
- [1] The training session code: this is the unique identifier for the session.
- [2] The name of the training model to use if you are using templates.
- [3] The name of the training: the administrative name of the training.
- [4] The title of the training: the title that will be displayed on the learners' dashboard.
- [5] Location of the training: this indication is only useful for completing invitations and informing participants.
- [6] The cost of the training if it is paid.
- [7] A detailed description of the training.
- [8] An illustration image that will be displayed on the learners' dashboard.
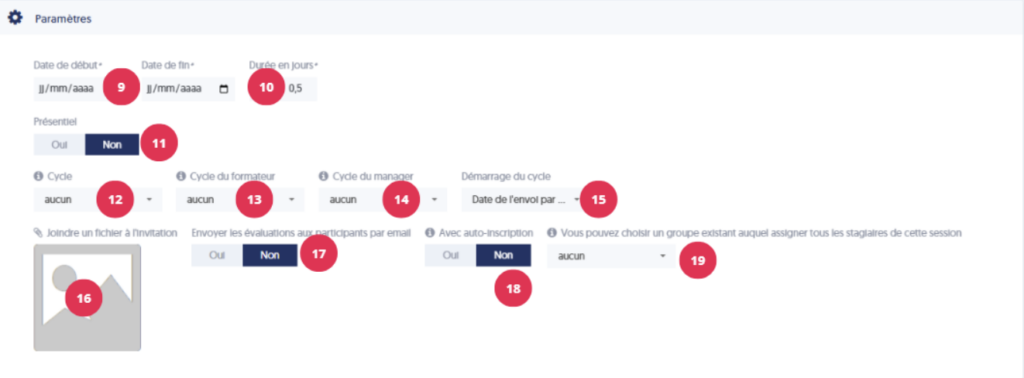
- [9] Start and end dates: You will have a calendar to select them.
- [10] Duration in days: this refers to the actual number of training days, and not the difference between the start date and the end date.
- [11] In-person: if you want to distinguish between overall training dates and a more specific in-person period, indicate YES. You will then be able to enter specific in-person dates within the training period.
- [12] Cycle: add an evaluation cycle to the training in order to send evaluations and surveys to the trainees.
- [13] Trainer's cycle: add a training evaluation cycle to send to the trainers.
- [14] Manager's cycle: add a training evaluation cycle for the trainees' managers.
- [15] Cycle start: when the cycles should start.
- [16] File attached to invitations: you can select a file that will be sent to participants with their invitation. The typical use is to attach a direction plan and practical details.
- [17] Send invitations by email: will participants receive an invitation email for each evaluation sent during the training, or will they work directly on their dashboard?
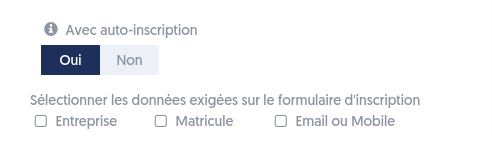
- [18] If you chose the company option "With login code," you can choose self-registration for learners in the training. In this case, a form with the company name, employee ID, and email according to your selection will be presented before accessing the training.
- [19] You can choose an existing group to assign all trainees.

Trainer: by clicking on this field, a user selection panel will appear to indicate the trainers. A trainer must be one of the users already defined in your company. As usual, you will have various search tools to find the desired person (by name, by group, by user type).
When you validate this form, the training is created. If you do not use a training template, you will still need to add educational resources and invite participants (unless you chose the self-registration mode). This is what we will see next.