User Groups
To create a new user group, go to the Groups tab on the Users page.
Note that this page has two quite different layouts depending on whether you select all users or a specific group.
Cross-view, users & groups
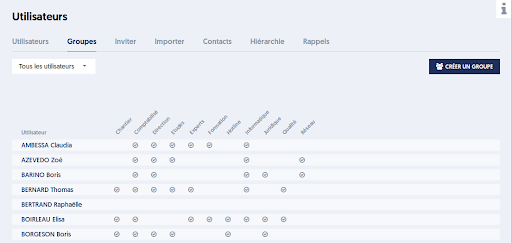
If you select All users, the page displays a matrix showing users' membership in groups:
- Rows: users
- Columns: existing groups
- At the intersection: a mark indicating the user's membership in the group.
View of a specific group
In the selector located at the top left, you can select an existing group. The page will then focus on this group.
There are two possible views:
- Either the list includes all users, and you can check or uncheck the boxes on the left to select the users belonging to the group,
- Or the list only shows the users of the group.
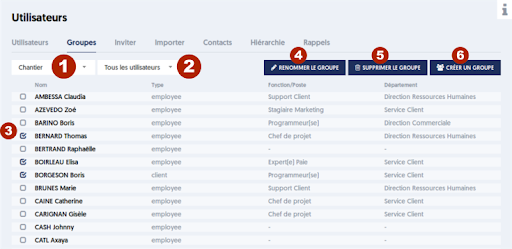
In the previous image:
- [1] the selector allowing you to switch from a all users view to a view focused on a particular group
- [2] when you are in a specific group, selector [2] allows you to choose either a list of all users, regardless of whether they belong to the group or not, or a view where the list is limited to the users of the group.
- [3] the checkboxes located to the left of each user define whether they belong to the selected group.
To assign a user to a group or conversely remove a user from a group, the procedure is simple: you check or uncheck the box.
As soon as a box is modified, the button bar changes, and appears as follows:
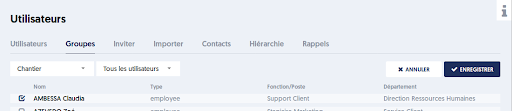
You can then save the change or cancel it. You can also make other modifications before saving.
Create, rename, delete a group
On the Groups tab of the Users page, click the CREATE A GROUP button to create a new group. A panel opens on the right, where you are asked to give a name to the new group. This name must be unique.
When the page is focused on a group (using selector [1] from the image), you have two additional buttons: RENAME GROUP and DELETE GROUP.
If you rename the group, the panel on the right will ask you to provide the new name for the group.
If you delete the group, the panel on the right will ask for confirmation. Note that, of course, users belonging to the group are not deleted.
Another way to assign users to a group
On the Users tab of the Users page, when you select one or more users, the button bar presents an ASSIGN button that allows you to assign the selected users to a specific group.
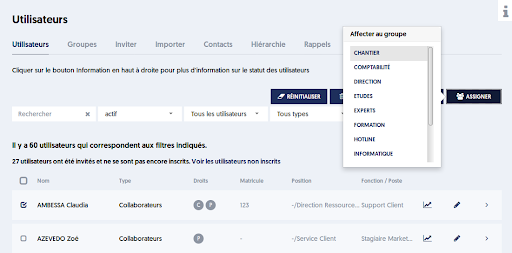
When you click the ASSIGN button, a dropdown appears, allowing you to select a new group of membership. Note that the chosen group will be added to any groups that these users may already belong to. Previous assignments are not canceled. To remove users from a group, use the features of the Groups tab.
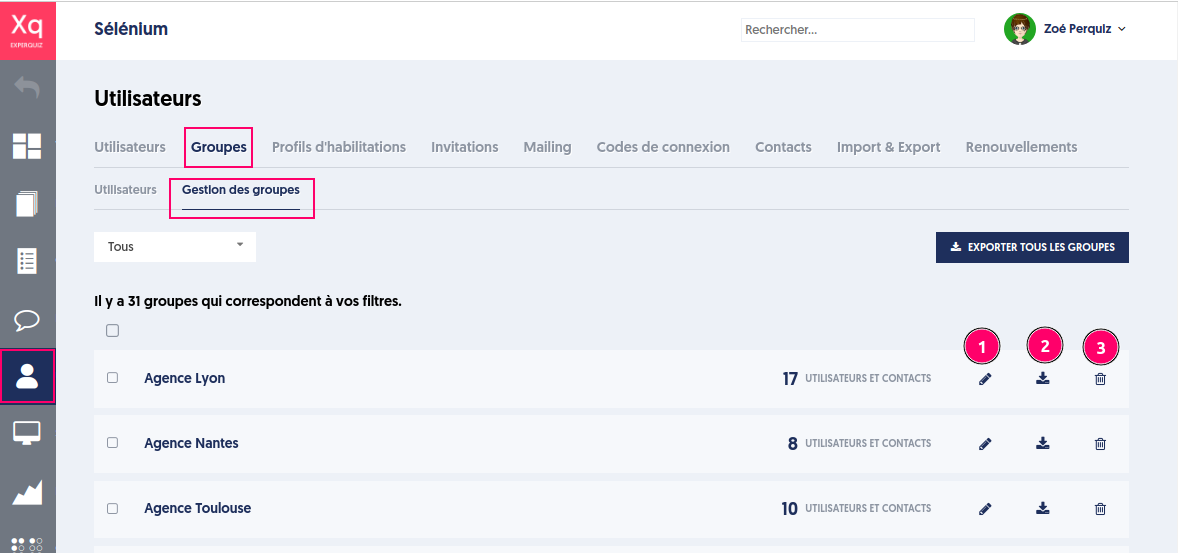
List of user groups
Each row shows the group name, the number of users and contacts in the group, and the possible actions:
- Edit name
- Export users from the group
- Delete group
Certain actions can be applied to a selected list of groups (1)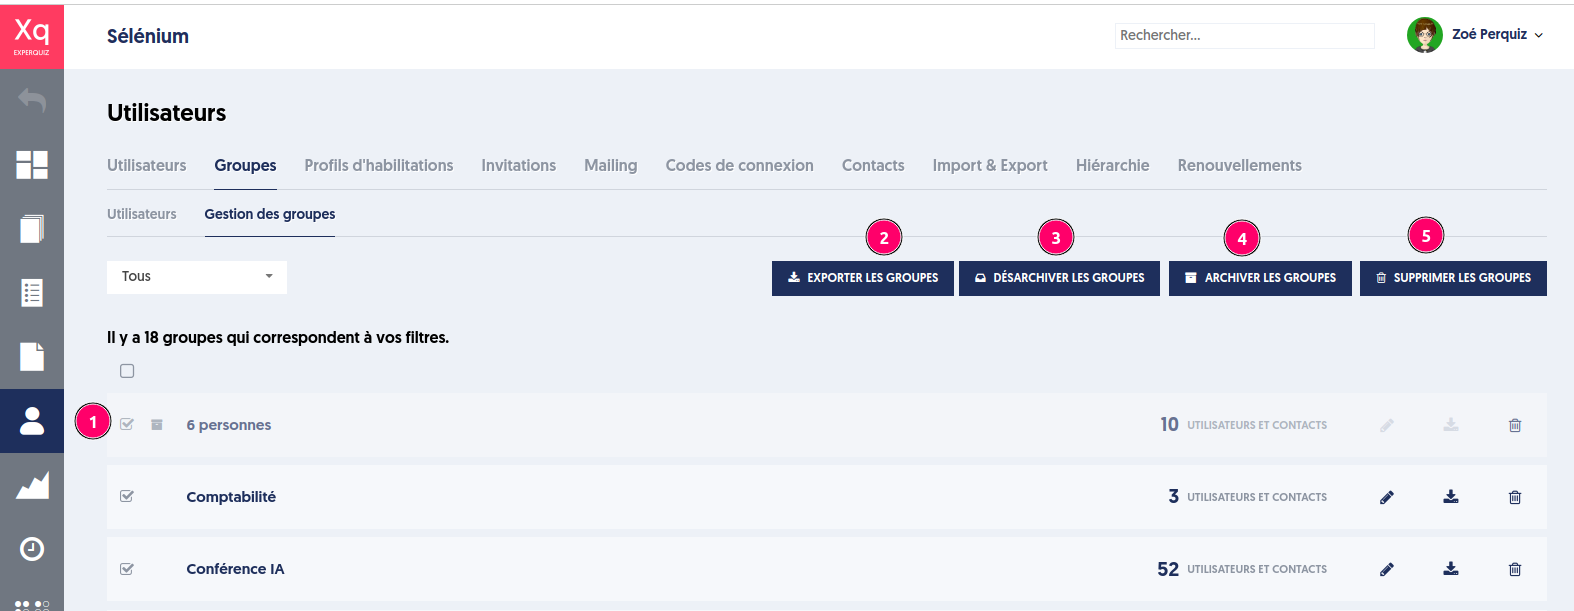
The possible actions on the selected groups are:
- Export users and their groups
- Archive the unarchived groups from the list of selected groups
- Unarchive the archived groups from the list of selected groups
- Delete the selected groups
Implications in the application
Administrator Side
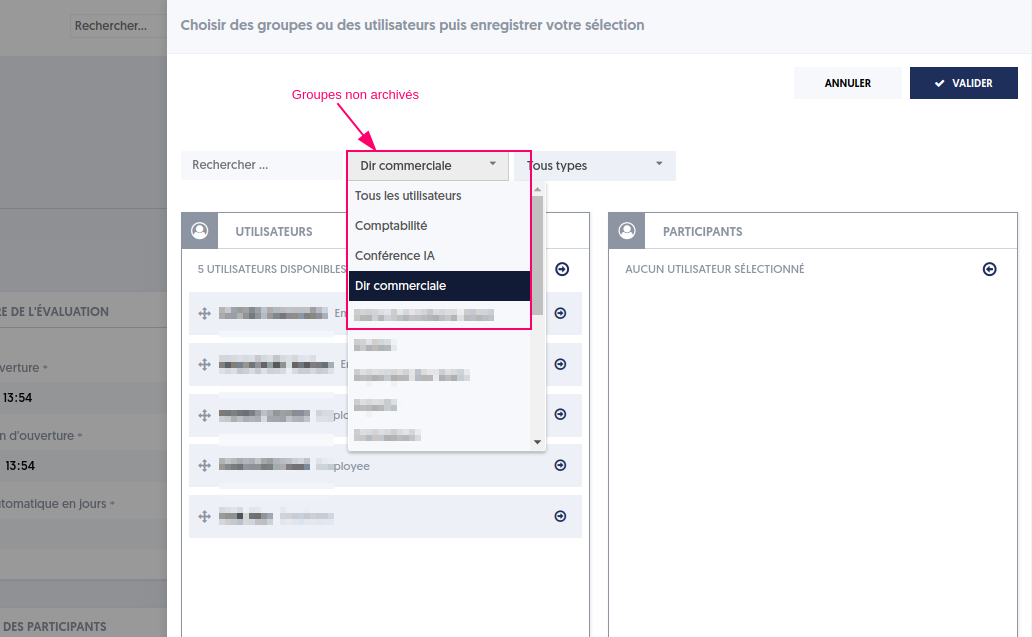
Archived groups are not shown in the group filters on the user list page, in the list of groups to assign, in the list of groups to manage visibility, or in invitations.
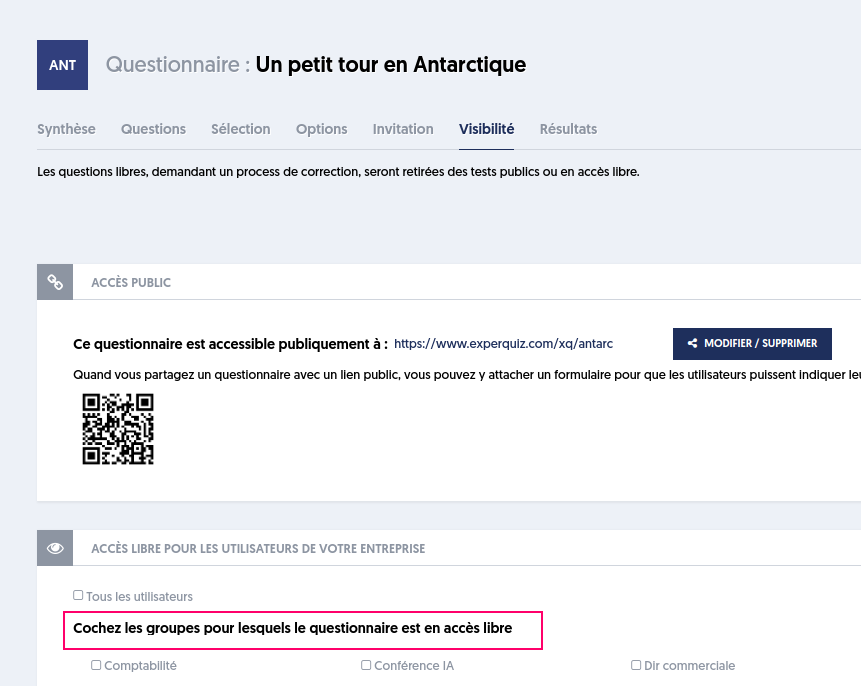
User Side
Publicly accessible resources, whether they are questionnaires, modules, or media, will be accessible to a user if they belong to a non-archived group for which these resources are shared.